Sister project management

The Sister Project Management functionality of Plant Modeller allows 3D model related objects and documents to be exported from one project ("source project") and imported to another project ("target project"). These exports and imports can only be done at the main site of a project. All changes are managed using a single export–import context; once the sister project data has been exported from the source project and imported to the target project for the first time, the objects are tracked in the source project so that only the changes need to be transferred to the target project. For more information on the concept, see the tutorial Sister project tutorial.
On the Model tab, in the Content group, the Sister project management menu includes the following commands.
User-level commands
Select Model tab > Content group > Sister project management to use the following user-level commands.
Unlink objects from sister project | Color by sister project link status | Automatically link to Diagram and EDM
Unlink objects from sister project
Use this command to unlink 3D model objects and related documents, so that they are removed from Sister Project Management.
Note: Cables can be unlinked simply by checking them out in the Cable Manager dialog, as described in Check Out / Check In. Moreover, recreating the cable routing network as described in Recreate unlinks the cable routing network and all the cables.
Prerequisites
-
Your user profile or user account is authorized to unlink sister project objects. See Sister Project.
Do the following:
-
Select Model tab > Content group > Sister project management > Unlink objects from sister project.
-
Pick the set of 3D objects to be removed and press Enter.
The Sister Project Hierarchies dialog opens, showing the hierarchy groups of the selected objects. In the columns of this dialog, you can see information such as does the hierarchy have a drawing related to it and is unlinking possible.
You can select Show in View to show the selected hierarchies and hierarchy members in a separate view. If you also select Status colors, the objects that can be unlinked are shown in green and those that cannot be unlinked are shown in gray.
To get more details about the selected hierarchies, click Show Details. A textual report is generated.
-
To complete the unlinking, click OK. The 3D objects are checked out to the area and the 3D objects and the associated drawings are unlinked from the sister project.

See also Unlinking sister project objects.
Color by sister project link status
You can select which work views use color to indicate which objects have been imported as sister project objects.
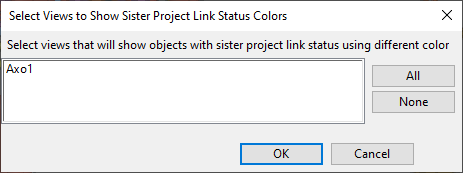
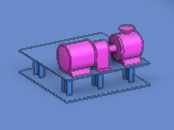
When you start this command for the first time, the program creates a Surface Shading Style object by the name "ColorBySisterProjectLinkStatus" to the project database, to Document Production > Surface Shading Rules. This shading style is assigned to the selected views. Color legend:
|
Linked objects |
Magenta |
|
Unlinked objects |
Brown |
|
Local objects created in the target project |
Blue |
To remove the shading style from a view, run the command again, clear the required selection, and click OK.
Automatically link to Diagram and EDM
When sister project data is imported to the target project, the program automatically links the 3D model objects to integration objects that exist in COS at that time and have matching position IDs. If new integration objects are added to COS later, you can use the Automatically link to diagram and EDM command to update the linking. This might be needed, for example, if the model objects were imported before CADMATIC Electrical or CADMATIC P&ID released the diagram contents as external (integration) objects.
This automatic linking supports the following integration objects:
-
Electrical Device objects
-
External Data Management (EDM) objects
-
Externally Provided P&I Data (EPD) objects
-
Diagram Cable objects
Note: Using this command requires that the sister project has a running Plant Modeller Service Instance that has been installed with the Manage diagram integration option enabled. See Installing a Plant Modeller service instance.
Administrator-level commands
Select Model tab > Content group > Sister project management > Administrator to use the following project administrator-level commands.
Create base project export | Create export settings | Edit export settings | Test query | Export to sister project | Import into sister project | Link objects to sister project | Restore deleted model objects to sister project | Restore deleted line objects to sister project | Restore deleted document objects to sister project
Create base project export
Use this command to export the current project setup to a base project CX file. This CX file can then be used to create a new sister project.
This export is like a normal CX export created using the "Project Settings" option (see Exporting project data to CX), but to enable sister project creation it also includes the pipelines, duct lines and cable tray lines defined in the current project.
The export requires that pipe parts (used before 2019T3) have been converted to piping parts.
Create export settings
Use this command to create settings for exporting objects and lines from the current project (source project) to the target sister project. The settings are saved in COS, and when a designer is exporting objects to a sister project, the designer selects which export settings to use.
Prerequisites
- COS server contains the target (sister) project.
- Project database contains a model query for sister project export. See Query.
Do the following:
-
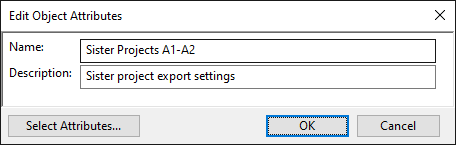
Select Model tab > Content group > Sister project management > Administrator > Create export settings. The Edit Object Attributes dialog opens.
-
Enter a suitable name and description for the settings object and click OK.
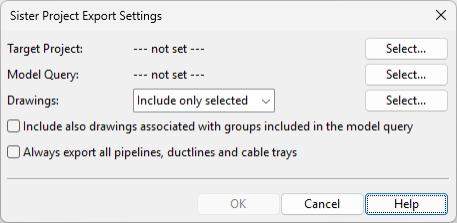
The Sister Project Export Settings dialog opens.
-
Define the export settings:
-
Target Project – Click Select to select the target project from COS.
-
Model Query – Click Select to select a model query that picks the objects that are to be exported to the target project. Also dependent objects that the query does not specifically select are exported, as described in Sister project model query and dependent objects.
-
Drawings – Select the required option—this cannot be changed later:
-
Include all – Select this option to include all drawings in the export.
-
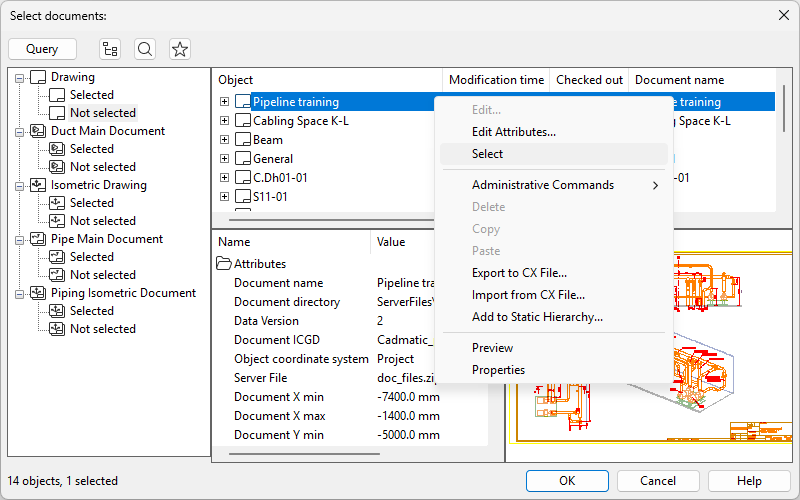
Include only selected – Select this option to manually select the drawings to include in the export. In the Select documents dialog, use the Select and Deselect context-menu commands to define the set. Selecting a main document type automatically selects all its spool documents.
-
-
Include also drawings associated with groups included in the model query – Select this option if you chose Include only selected and want the export to include drawings associated with groups selected by the model query. For example, if the model query matches the duct main document group 'Duct123', then the related duct main document and all duct spool documents are exported.
-
Always export all pipelines, ductlines and cable trays – Select this option if CADMATIC P&ID is used in the project, so that all possible lines will be exported to the target project and thus made available to diagram design.
If the option is not selected, only the lines that are referenced by the other objects in the export (3D model objects, construction settings, and so on) will be exported.
Note: If the option is not selected and P&ID is used, there is a risk of lines being duplicated in the target project. The lines cannot be edited in P&ID either unless they are unlinked (made local).
Then, click OK.
The settings are saved in Project Environment > [project] > Sister Project > Export settings.
-
Edit export settings
Use this command to edit previously created export settings.
You cannot change the setting that defines whether exports include all or selected drawings. However, when it is set to export selected drawings, you can modify the set of included drawings.
Test query
Use this command to test that the model query selects the objects that you intend to export as sister project data.
Prerequisites
- Project database contains sister project export settings. See Create export settings.
Do the following:
-
Select Model tab > Content group > Sister project management > Administrator > Test query.
The Select Target Export Settings dialog opens.
-
Select the sister project export settings whose model query you want to test and click OK.
All the objects that the query selects directly or that have dependencies to the objects the query selects are shown in a separate 3D view.
Export to sister project
Use this command to export objects from the current project to a sister project file (.sse). The file can then be used to import objects to a sister project in the same COS server.
The export uses a predefined model query and export settings to select which 3D objects (and other objects that they reference) to include in the export file. In addition to 3D objects, the export can include also other kinds of entities found in the project database such as Plant Modeller Drawings, Duct Main Documents, Duct Spool Drawings, Pipe Main Documents, Pipe Spool Drawings, Isometric Drawings, and Spools.
The exported objects are tracked, so that in future exports only the changed objects need to be exported.
Prerequisites
-
Project database contains sister project export settings. See Create export settings.
Do the following:
-
Optionally, select Model tab > Content group > Sister project management > Color by sister project link status to use color to indicate which objects are sister project objects.
-
Select Model tab > Content group > Sister project management > Administrator > Export to sister project.
The Select Target Export Settings dialog opens.
-
Select the export settings and click OK.
The Save As dialog opens.
-
Select a saving location that is accessible to the administrator of the target project, enter a descriptive name, and click Save.
The export file is saved in the specified location and a log opens.
-
Review and then close the log. From now on, the program tracks the exported objects. If you re-export, the import history of the target project is used to indicate how many objects are new or different in the current export.
Import into sister project
Use this command to import objects from a sister project export file to the sister project specified in the export file.
Prerequisites
-
Object ownership settings allow import to update existing objects.
-
Sister project export file (.sse)
-
Normally, the file has been created as described in Export to sister project.
-
If you are performing the import to recreate previously deleted sister project objects, the file has been created as described in Restore deleted model objects to sister project, Restore deleted line objects to sister project, or Restore deleted document objects to sister project.
-
Do the following:
-
Select Model tab > Content group > Sister project management > Administrator > Import into sister project. A dialog opens for selecting the file to import.
-
Select the .sse file and click Open.
-
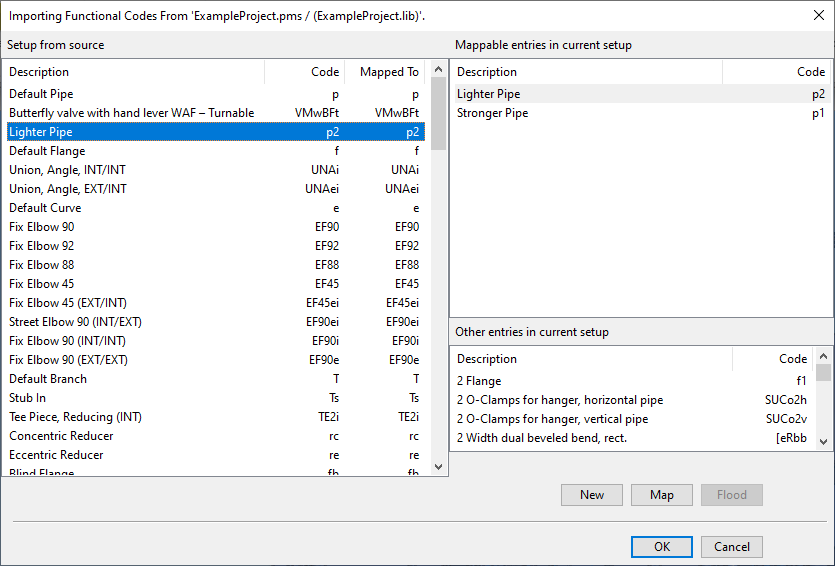
If the imported objects contain Functional Codes that have not been imported before, the Importing Functional Codes From... dialog opens.
Map imported Functional Codes to existing Functional Codes as required and click OK.
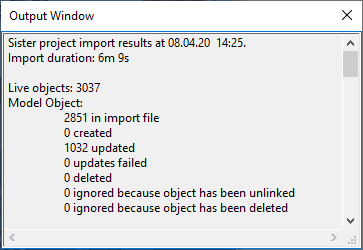
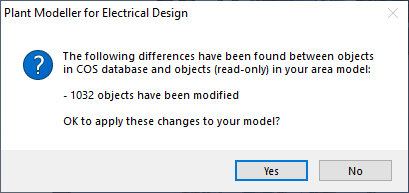
The data is imported, a log opens, and you are prompted whether to apply the changes to the model.
Link objects to sister project
Use this command to link previously unlinked 3D model objects back to the scope of Sister Project Management.
Prerequisites
-
Your user profile or user account is authorized to unlink sister project objects. See Sister Project.
-
The objects to be linked are checked out to you. To link cables or cable network parts, check out the parts in the Cable Manager dialog. See Check Out / Check In.
Do the following:
-
Optionally, select Model tab > Content group > Sister project management > Color by sister project link status to use color to indicate which objects are sister project objects.
-
Select Model tab > Content group > Sister project management > Administrator > Link objects to sister project.
-
Select the objects from the 3D model, and press Enter.
The objects are linked to the sister project and checked in, and their ownership is relinquished.
See also Re-linking sister project objects.
Restore deleted model objects to sister project
You can restore model objects that have been unlinked and then deleted from the sister project.
In the source project, running this command allows you to select model objects that have been exported in the past and export them into a sister project export file (.sse).
In the target project, use Import into sister project to restore the deleted objects from the .sse file. The restored objects are automatically relinked to Sister Project Management.
Restore deleted line objects to sister project
You can restore line objects that have been unlinked and then deleted from the sister project.
In the source project, running this command allows you to select line objects that have been exported in the past and export them into a sister project export file (.sse).
In the target project, use Import into sister project to restore the deleted objects from the .sse file. The restored objects are automatically relinked to Sister Project Management.
Restore deleted document objects to sister project
You can restore document objects that have been unlinked and then deleted from the sister project.
In the source project, running this command allows you to select document objects that have been exported in the past and export them into a sister project export file (.sse).
In the target project, use Import into sister project to restore the deleted objects from the .sse file. The restored objects are automatically relinked to Sister Project Management.